Installing Ubuntu on an Asus Chromebox (Panther)
This tutorial is based on the information provided in the Gallium tutorial for Panther and the Mr. Chromebox Firmware Script.
Preparing the Chromebox
Disabling hardware protection
Open the Chromebox. You do it by removing the four screws under the rubber pads in the bottom part of the machine and then gently prying open the box with a thin, flat metallic (or plastic) surface. iFixit kit has the perfect tools for this.
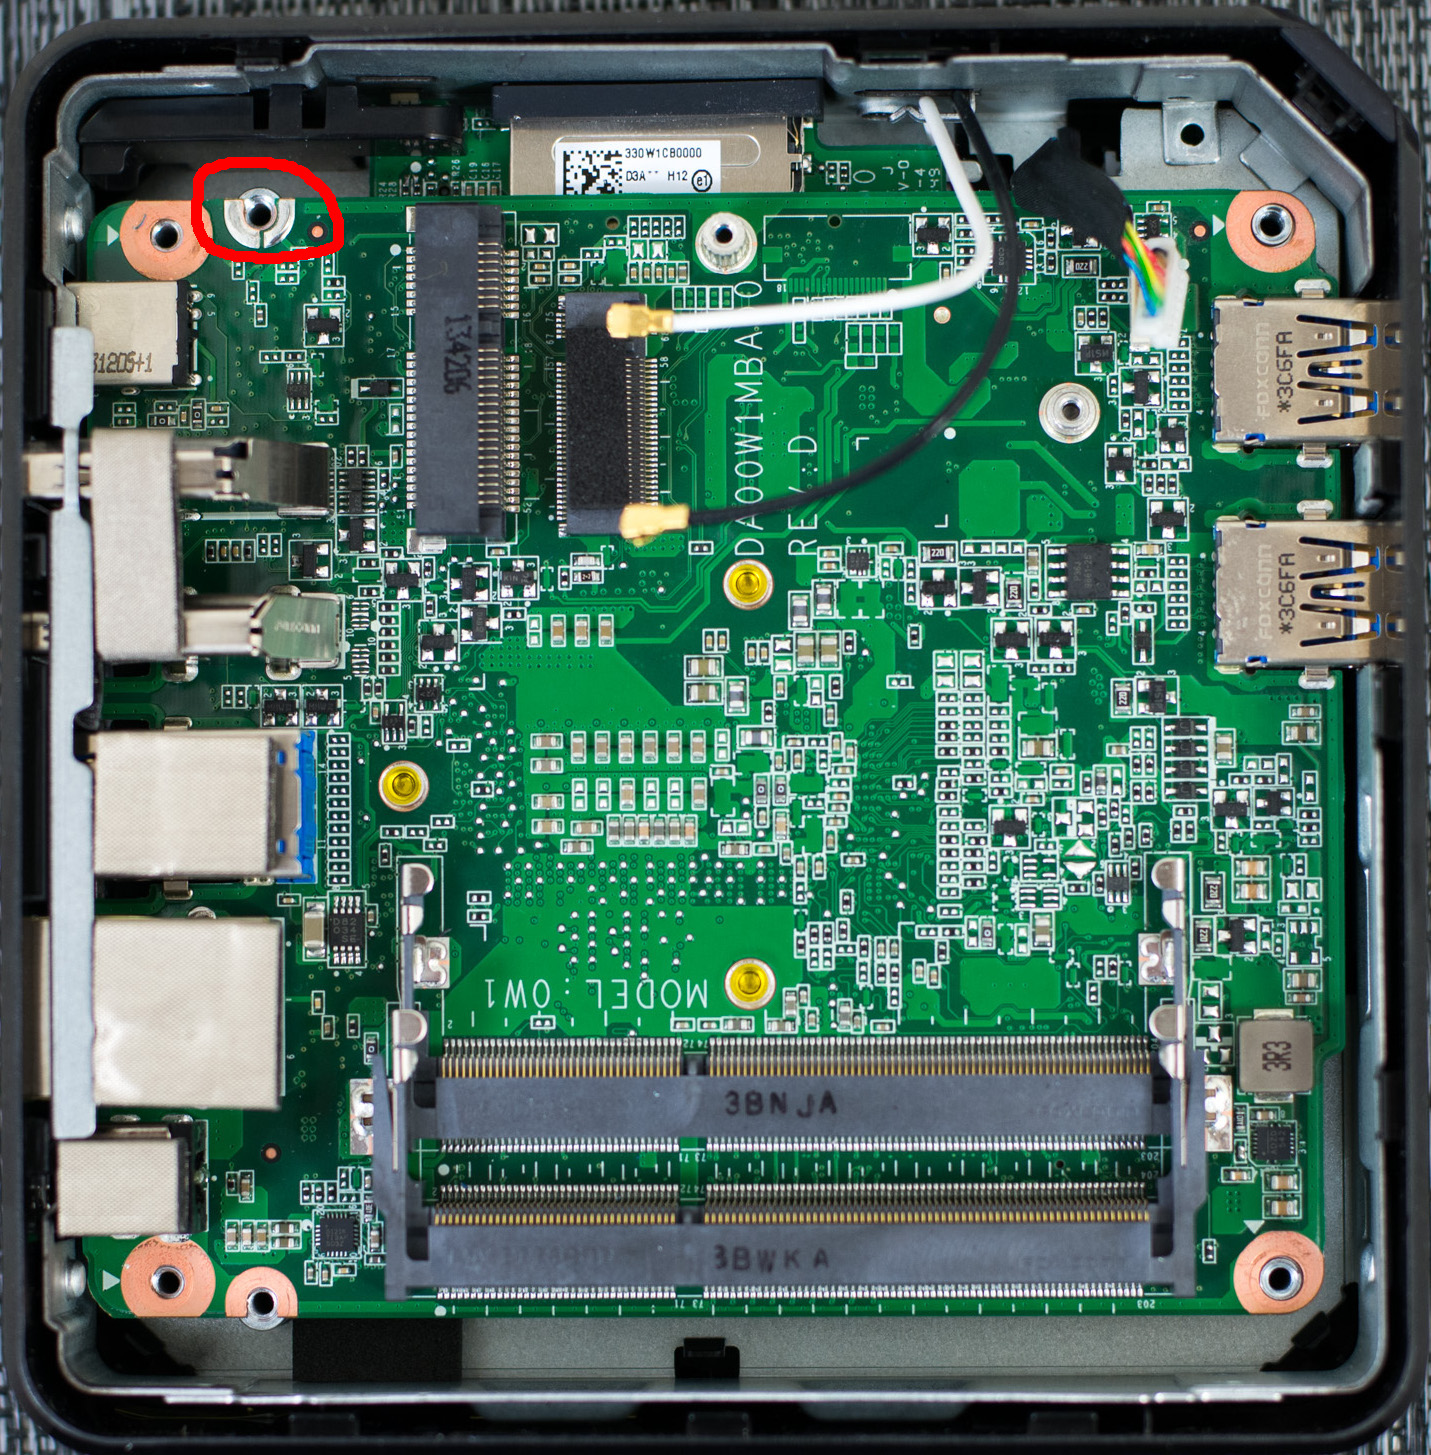
Then, locate this screw and remove it. It should be easy to spot because it's in the fringe of the circuit board and is the only one that has a silver lead semicircular contact point that the screw is shortcuiting.
Enabling developer mode and boot flags
For this next phase, you'll need a mouse, keyboard and a screen. Once all this is plugged, plug the power cable. Get a paperclip and insert it into the recovery button that right on top of the kensington lock hole. While pressing the recovery button, press the power on button and hold the recovery button for a couple of seconds. The Chromebox should boot and tell you the OS image is missing. This is OK, press Ctrl+D to enter developer mode and press the recovery button again to confirm.
The Chromebox will start entering Developer mode. This will take a while. Once done, the Chromebox will reboot. Press Ctrl+T again to boot into developer mode.
Open a Chrome tab, open a Cros terminal by pressing Ctrl+Alt+T. Type shell and hit enter to open bash. The prompt should look like this: chronos@localhost / $. Then type:
sudo crossystem dev_boot_legacy=1
Updating the Chromebox firmware
Execute these commands as a normal/non-root user. Running them as root will break things.
First, open a new cros shell pressing Ctrl+Alt+T. Activate another bash shell by typing shell. Then, type in the following commands
cd; curl -LO mrchromebox.tech/firmware-util.sh
sudo install -Dt /usr/local/bin -m 755 firmware-util.sh
sudo firmware-util.sh
You can copy and paste the previous commands or, even better, type them yourself and double check them by using Tab completion.
You will now be presented with the Chrome OS Device Firmare Utility Script. For details on how it works, go to the Mr. Chromebox page. Here, we will focus on converting the Chromebox into a regular PC, with no comeback. Select Option 2) Install/Update UEFI (Full ROM) Firmware, then type y (Enter), y (Enter) and n (Enter) to the following three questions. Once the firmware has been flashed, press Enter to go to the main menu and then press P to poweroff the Chromebox.
Creating an Ubuntu image
Well, this is easy. Just use your favorite tool.
Installing Ubuntu
- Set up WiFi
- Set up US keyboard to avoid compatibility issues
- Perform minimal installation
- Select Install additional drivers
- Create a neutral user: for a Kubernetes cluster I've set up a user called k8s
Post-install steps
Once logged in, perform a software update:
sudo apt-get update
sudo apt-get upgrade -y
Enable SSH access for the user k8s, and allow it do sudo:
sudo apt-get install openssh-server
sudo systemctl status ssh
Finally, disable graphical boot up to save on resources and allow shell access:
sudo systemctl set-default multi-user
sudo vi /etc/default/grub
Change the line GRUB_CMDLINE_LINUX_DEFAULT="quiet splash" to GRUB_CMDLINE_LINUX_DEFAULT="quiet splash nomodeset"and update grub:
sudo update-grub
Now, when the machine restarts you can get a login screen by pressing Ctrl+Alt+F3.