IoT Devices Lab Series 1 - Setting up an IoT Development Workstation
Introduction
This is a short guide on how to get a Linux based IoT Development Workstation in your laptop thanks to Virtualbox and Vagrant. The Virtual Machine has several tools installed that are relevant for the development of Micropython software for the ESP32 MCU.
1. Install Virtualbox and Vagrant
Here, we'll download and install VirtualBox and Vagrant for you Operating System. Read on for OS specific instructions.
On Mac OS X
Just use brew. If you don't have it already, open a terminal and do:
/bin/bash -c "$(curl -fsSL https://raw.githubusercontent.com/Homebrew/install/HEAD/install.sh)"
Once brew in properly installed in your system, use it to install Virtualbox:
brew install virtualbox
Same for Vagrant, install it by doing:
brew install vagrant
Your installation is complete! Yo're now ready to move forward and proceed with the next section.
On Linux
For Debian-based systems (like Ubuntu), open a terminal and use apt:
sudo apt install virtualbox
Same for Vagrant:
sudo apt install vagrant
Note
If you have a different distribution, refer to Virtualbox's Linux specific instructions and Vagrant's Downloads and install pages, with specific instructions for different Linux flavors.
On Windows
First, go to the Download Virtualbox for your operating system page and select the Virtualbox Platform Packages exe file to download. At the time of writing of this guide, the direct link is VirtualBox 6.1.32 platform packages but I recommend you finding the latest version of the package yourself.
Now, make sure you follow Windows installation instructions from the Virtualbox page to get Virtualbox installed in your system.
Warning
If when trying to run Virtualbox you get this error: Stderr: VBoxManage.exe: error: Not in a hypervisor partition (HVP=0) (VERR_NEM_NOT_AVAILABLE) you may need to enable virtualization in your Windows computer. Follow this tutorial that explains how to do it.
Warning
Windows, VirtualBox, and Hyper-V
If you wish to use VirtualBox on Windows, you must ensure that Hyper-V is not enabled on Windows. You can turn off the feature by running this Powershell command:
Disable-WindowsOptionalFeature -Online -FeatureName Microsoft-Hyper-V-All
You can also disable it by going through the Windows system settings:
- Right click on the Windows button and select ‘Apps and Features’.
- Select Turn Windows Features on or off.
- Unselect Hyper-V and click OK.
As per Vagrant installation, just go to the Vagrant Downloads page and click on the Windows installer.
Note
Vagrant is not a GUI tool. From now on, when you are directed to use vagrant on Windows, you should open a command prompt and type the command vagrant from there.
2. Start up your machine
You now have installed all you need to get your Linux based IoT Development Workstation ready to rock!
Create a new folder in your home directory called swiot:
mkdir -p $HOME/sw4iot && cd $HOME/sw4iot
cd %userprofile%
mkdir sw4iot
cd sw4iot
Now, we need to create a file called Vagrantfile inside that folder:
Execute the following in the terminal:
cat <<-EOF > $HOME/sw4iot/Vagrantfile
Vagrant.configure("2") do |config|
  config.vm.box = "javiercanadillas/sw4iot"
  config.vm.provider "virtualbox" do |vb|
    vb.gui = true
  end
end
EOF
Create a new file with Notepad called Vagrantfile inside the sw4iot folder containing the following:
Vagrant.configure("2") do |config|
  config.vm.box = "javiercanadillas/sw4iot"
  config.vm.provider "virtualbox" do |vb|
    vb.gui = true
  end
end
After this, when running:
more $HOME/sw4iot/Vagrantfile
cd %userprofile%
more sw4iot\Vagrantfile
you should get the content mentioned above as output. If so, assuming you're already in the sw4iot folder, you're ready to launch your workstation by launching:
vagrant up
Vagrant should download an image template from the Internet and start a Virtualbox Virtual Machine with it, outputting some info like the following:
Bringing machine 'default' up with 'virtualbox' provider...
==> default: Importing base box 'javiercanadillas/sw4iot'...
==> default: Matching MAC address for NAT networking...
==> default: Checking if box 'javiercanadillas/sw4iot' version '0.1.1' is up to date...
==> default: Setting the name of the VM: vagrant-test_default_1645466353230_31427
==> default: Clearing any previously set network interfaces...
==> default: Preparing network interfaces based on configuration...
    default: Adapter 1: nat
==> default: Forwarding ports...
    default: 22 (guest) => 2222 (host) (adapter 1)
==> default: Booting VM...
==> default: Waiting for machine to boot. This may take a few minutes...
    default: SSH address: 127.0.0.1:2222
    default: SSH username: vagrant
    default: SSH auth method: private key
    default:
    default: Vagrant insecure key detected. Vagrant will automatically replace
    default: this with a newly generated keypair for better security.
    default:
    default: Inserting generated public key within guest...
    default: Removing insecure key from the guest if it's present...
    default: Key inserted! Disconnecting and reconnecting using new SSH key...
==> default: Machine booted and ready!
Got different reports about installed GuestAdditions version:
Virtualbox on your host claims:   6.0.0
VBoxService inside the vm claims: 6.1.32
Going on, assuming VBoxService is correct...
[default] GuestAdditions 6.1.32 running --- OK.
Got different reports about installed GuestAdditions version:
Virtualbox on your host claims:   6.0.0
VBoxService inside the vm claims: 6.1.32
Going on, assuming VBoxService is correct...
==> default: Checking for guest additions in VM...
==> default: Mounting shared folders...
    default: /vagrant => /Users/javier/vagrant-test
Warning
Vagrant should start your VM. If you get an error like this one:
Stderr: VBoxManage.exe: error: Implementation of the USB 2.0 controller not found!

VBoxManage.exe: error: Because the USB 2.0 controller state is part of the saved VM state,
the VM cannot be started. To fix this problem, either install the 'Oracle VM VirtualBox
Extension Pack' or disable USB 2.0 support in the VM settings.
Warning
If you're installing on Windows and you have an antivirus running, it may be possible that vagrant up fails saying tha the box javiercanadillas/sw4iot could not be found. If that is the case, your antivirus may be interrupting the download of the box. Try disabling it for the purpose of the first download and re-enabling it back after it has finished.
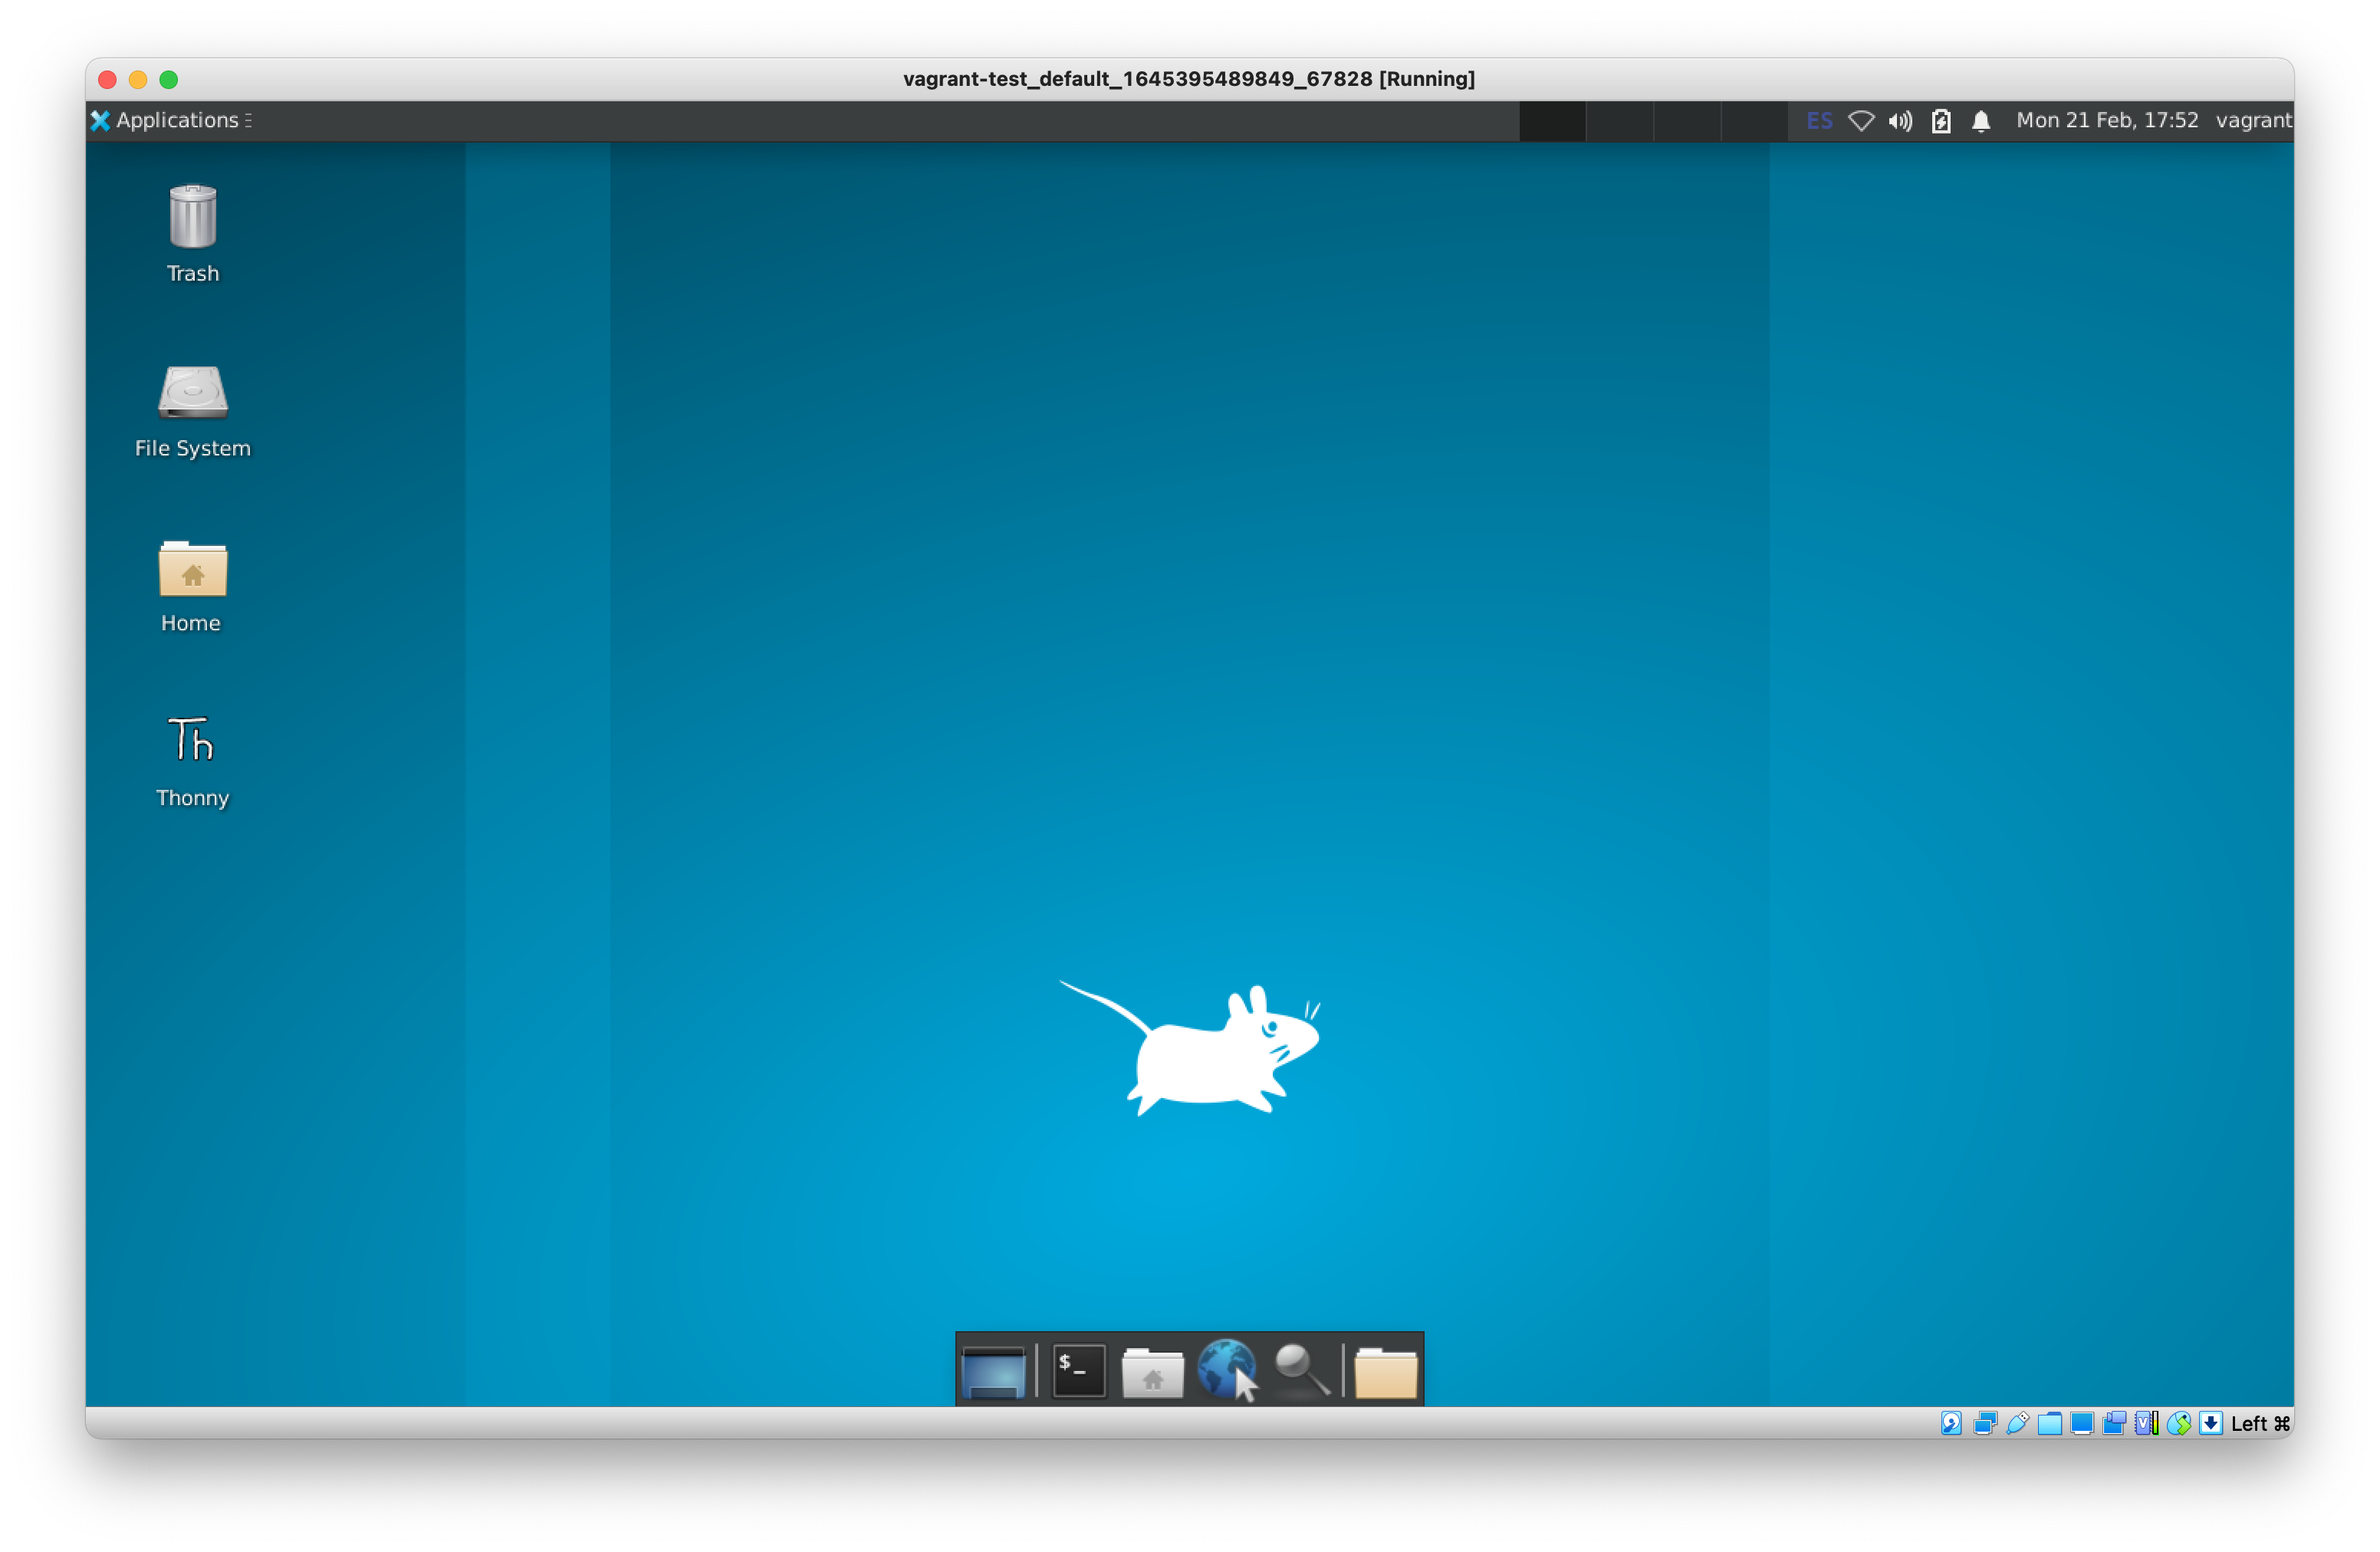
When Vagrant is finished, you should now see your Linux Workstation Desktop running in Virtualbox:
You can also check that everything is fine by SSH'ing to the machine:
vagrant ssh
You should get a prompt inside the VM:
Welcome to Ubuntu 21.10 (GNU/Linux 5.13.0-28-generic x86_64)

 * Documentation:  https://help.ubuntu.com
 * Management:     https://landscape.canonical.com
 * Support:        https://ubuntu.com/advantage

  System information as of Mon Feb 21 06:02:27 PM UTC 2022

  System load:  0.13               Processes:             203
  Usage of /:   19.4% of 30.83GB   Users logged in:       1
  Memory usage: 27%                IPv4 address for eth0: 10.0.2.15
  Swap usage:   0%


This system is built by the Bento project by Chef Software
More information can be found at https://github.com/chef/bento
vagrant@sw4iot:~$
Exit the SSH session by typing exit.
Info
The the user you'll be using in the VM is vagrant, with password vagrant. Keep this in mind as you may need it when logging in to your machine in the future.
3. Check device connectivity
Now it's time to get your ESP32 Dev Board and check connectivity against your Development VM.
While the VM is running Connect the ESP32 dev board, go to the lower right corner of the virtualbox VM window, and click on the small USB icon (third in the row from left to right). You should see the Silicon LabsCP2102 USB to UART Bridge Controller listed there (or a similar controller matching the integrated circuit doing the USB to serial conversion in your dev board):
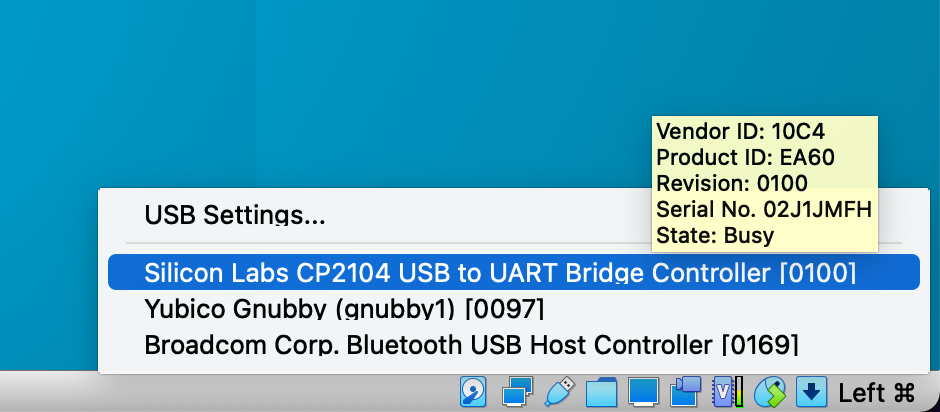
Select it so the ESP32 is connected to the Virtual Machine instead of your laptop.
Info
Once selected, the USB to serial adapter should appear in the USB menu with a bold checkmark indicating that it is indeed selected.
Then, fire a Linux Terminal Emulator (or an SSH session with vagrant ssh) and check that you see the corresponding port in the Linux VM:
ls /dev/ttyUSB*
This should list /dev/ttyUSB0 as attached.
4. Basic VM Operation
Managing the VM state
From a command prompt or shell from your laptop, you can control the Virtual Machine state:
vagrant haltwill stop the VMvagrant upwill start the VMvagrant reloadwill power cycle the VM (reboot)vagrant suspendwill suspend the machine
You can get the rest of options by typing vagrant --help.
Sharing files between your laptop and the VM
To share files between the host (your laptop) and the guest (the VM), place them in the same directory where you're running the vagrant command from in the host. The guest has read/write to that directory, mounted in the guest under /vagrant.
Changing Keyboard Layout
Open a new terminal from the VM XFCE4 destop. To change the keyboard layout to say, french (fr), type the following:
setxkbmap fr
Info
Note though that keyboard layout changes done this way won't persist if you reboot your system, and you'll have to reissue this command upon restarts.
6. More information
This document is based on the image built from this Gitlab repo: https://gitlab.com/sw4iot/ubuntu-iot-devel. Go there if you wish to understand how this development workstation is made.